-
Duvara gömülü kurulum
Kurulum yöntemleri:
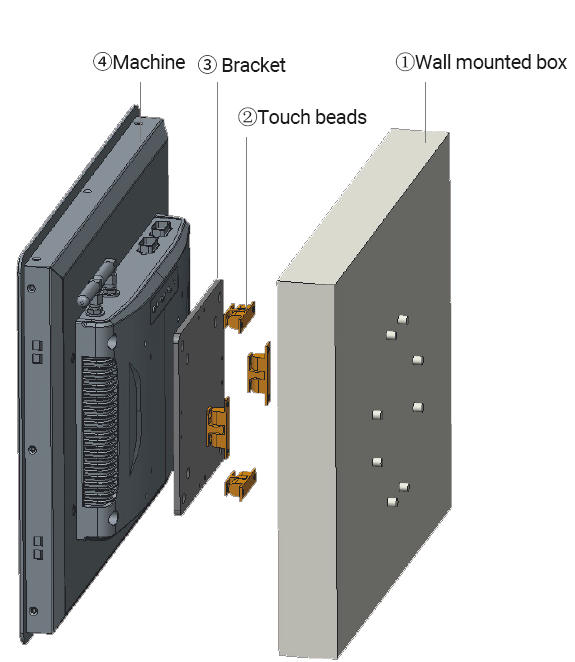
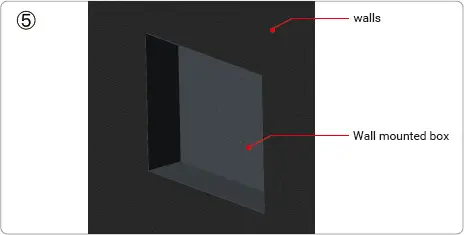
- İlk önce, Duvar montaj kutusunu düzeltin (incir. ①) duvara, Etki şurada gösterilir (incir. ⑤).
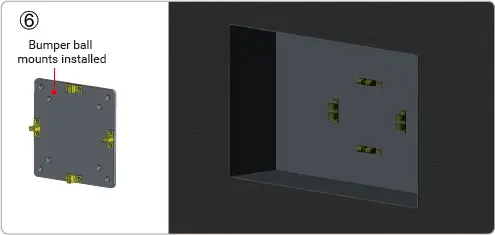
- Dokunmatik boncukları takın (Şekil ②) brakette (Şekil ③) ve gömülü kutu, Etki Şekil ⑥.
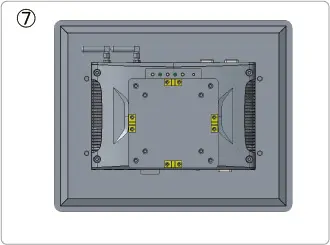
- Braketi takın (Şekil ③) Makinenin arka kapağında, Etki Şekil ⑦
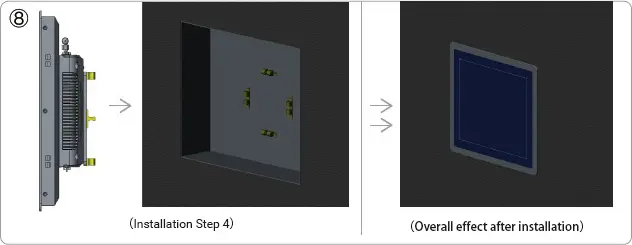
- Makinenin braketine monte edilecek (Şekil ④) Boncuklu Boncuklar Gömülü Duvar Kutusu ile Hizalanmış Pres Altında Dokunmatik Boncuklar, Kurulum tamamlandıktan sonra birleştirilen dokunmatik boncuklar, Etki şurada gösterilir (Şekil ⑧).


-
Açık Çerçeve Kurulumu
Kurulum adımları:
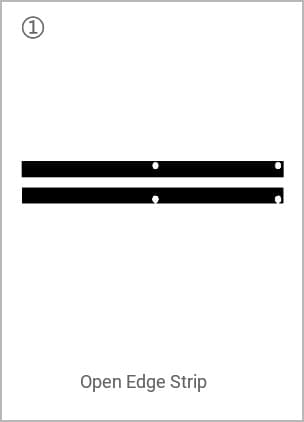
- Şekil ② 'da gösterildiği gibi tabletin arkasına açık kenar şeridini takın.
- Makineyi kabine koyun, Yan şeritleri düzeltin ve kurulumu tamamlayın, Şekil ③'de gösterildiği gibi.

-
Rackmount kurulumu
Kurulum adımları:
- Vida delikleri makinenin dört köşesinde ayrılmıştır, Şekil ①'de gösterildiği gibi.
- Makineyi kabine koyun, Etrafındaki vidaları düzeltin, & Kurulumu tamamlayın, Şekil ②'de gösterildiği gibi.

-
Konsol kurulumu
Kurulum adımları:
- Konsol braketini ② tablet bilgisayarın arkasındaki ayrılmış deliğe sabitleyin ① Kurulumu tamamlamak için vidalarla, Şekil ③'de gösterildiği gibi.

-
Panjurlu/katlama montajı
Kurulum adımları:
- Pankor braketi ② ve tablet bilgisayarın arkasındaki ayrılmış deliği vidalayın ①, Şekil ③'de gösterildiği gibi.


-
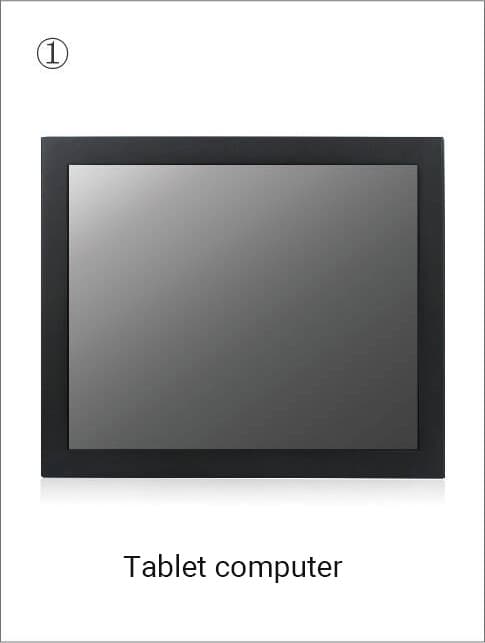
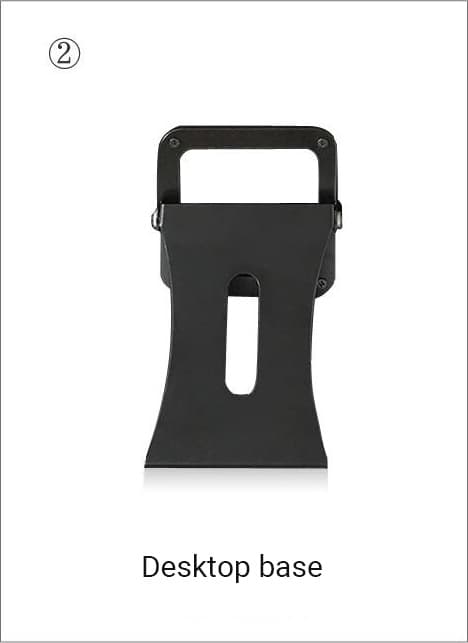
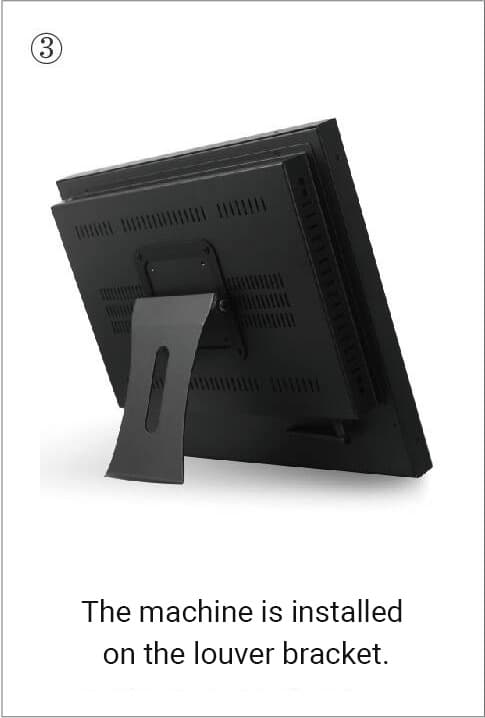
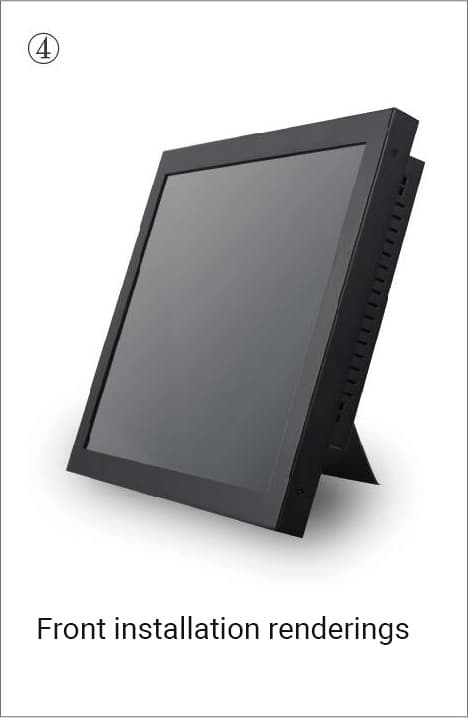
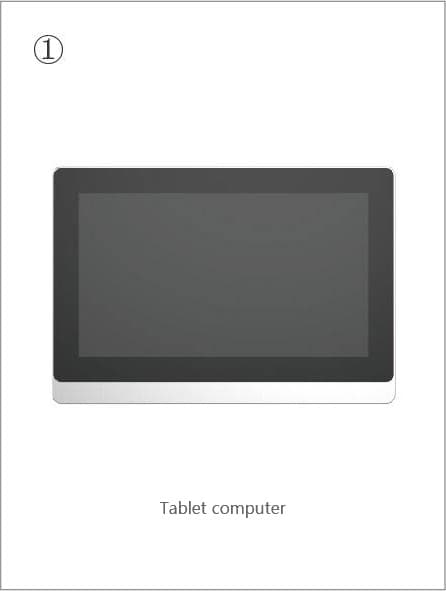
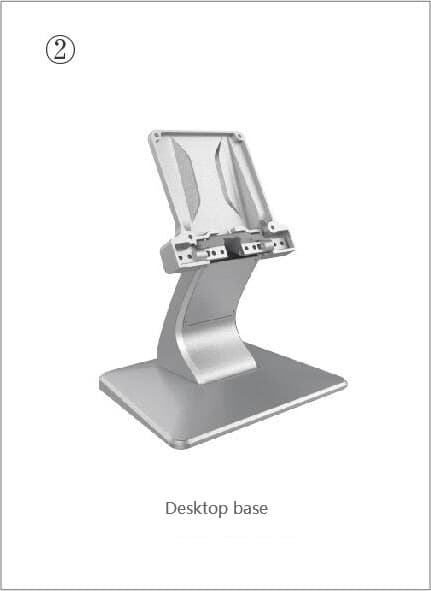
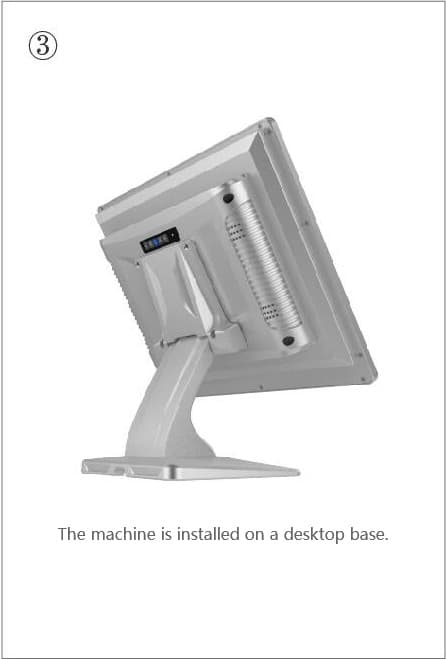
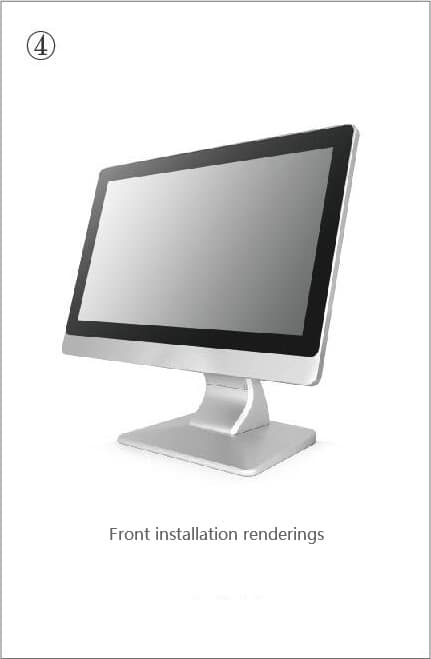
Masaüstü Kurulumu
Kurulum adımları:
- Kurulumu tamamlamak için masaüstü braket ② ile LCD ekran bilgisayarının arkasındaki ayrılmış delik arasındaki vidaları sıkın., Şekil ③'de gösterildiği gibi.


-
Duvara monte kurulum
Kurulum adımları:
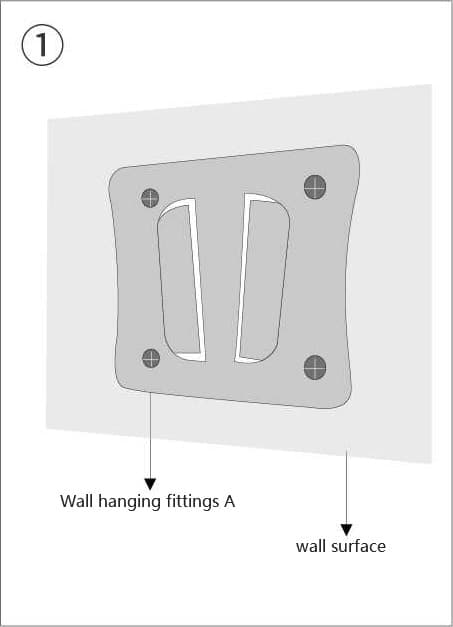
- Duvara monte edilmiş A montajını duvara takın ve vidaları sıkın, Şekil ①'de gösterildiği gibi.
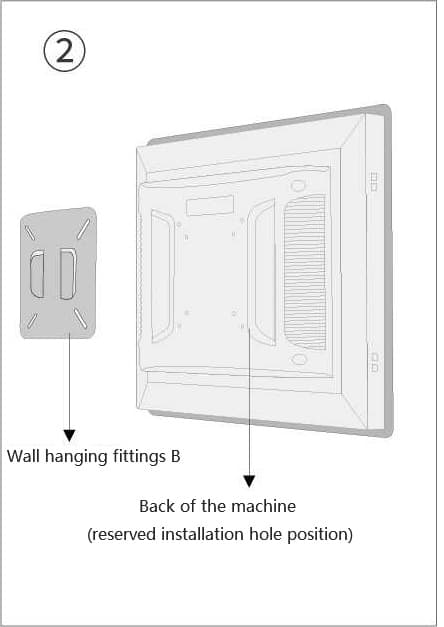
- Duvara monte edilen B'nin konumu ve makinenin arka yüzü Şekil ② 'da gösterilmiştir..
- Duvara monte edilmiş aksesuar B'yi makinenin arkasına takın ve vidaları sıkın, Şekil ③'de gösterildiği gibi.
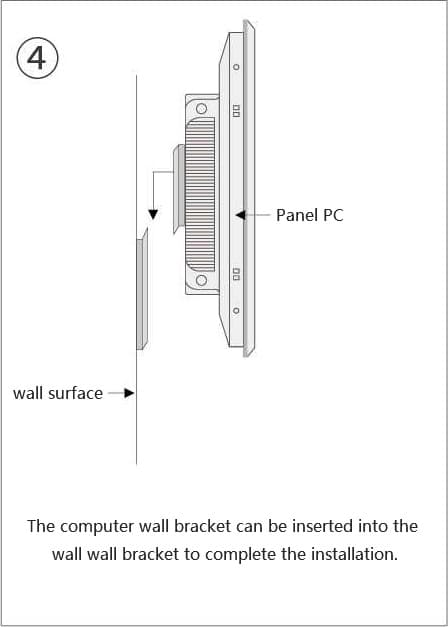
- Makine duvarını takma B takımı duvara takarak, ve kurulumu tamamlayın, Şekil ④'de gösterildiği gibi.


-
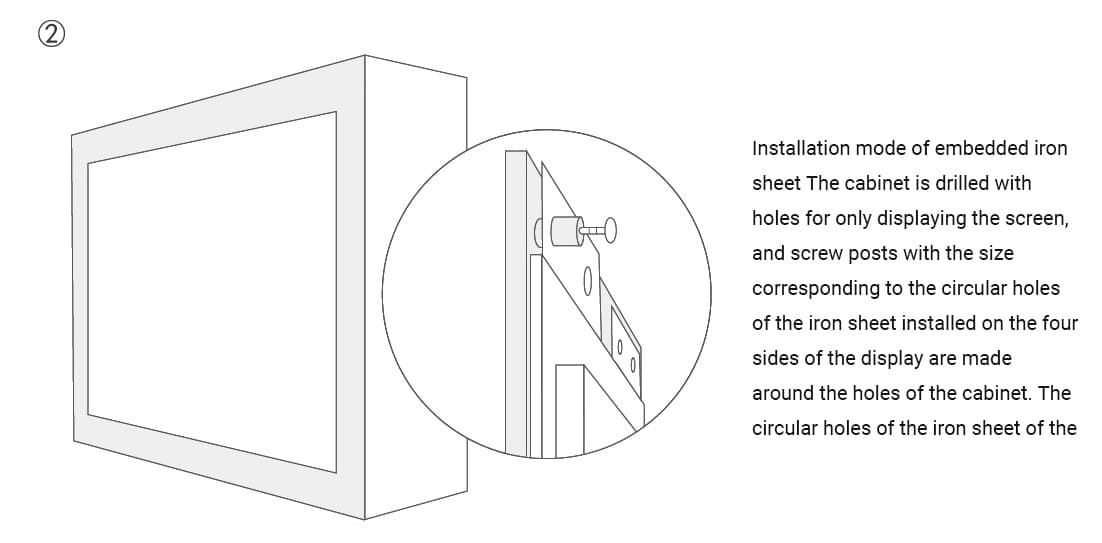
Demir sayfası gömme kurulumu
Kurulum adımları:
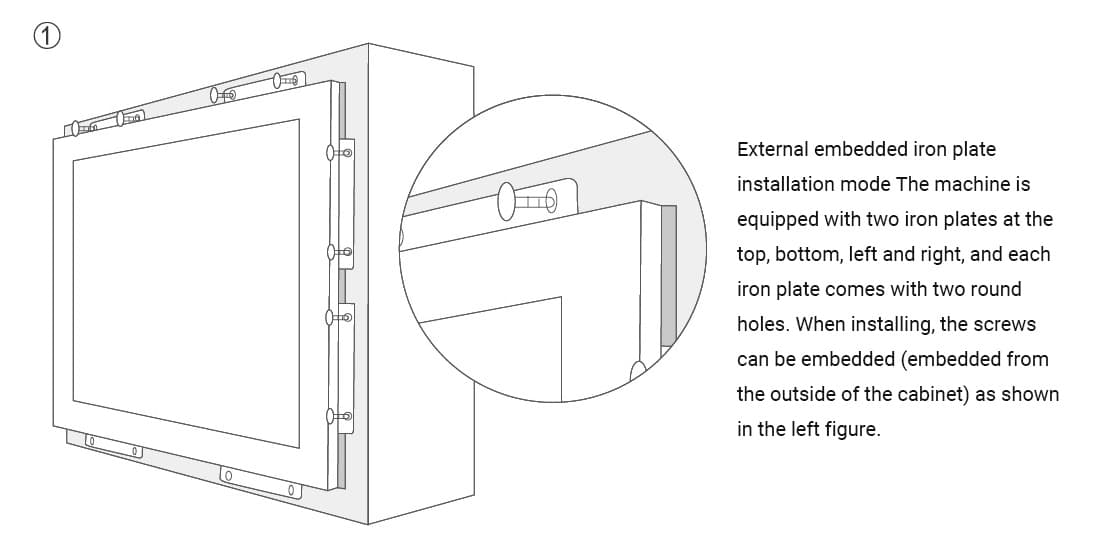
- Kabini maruz kalan ekranın boyutuna açın ve demir plakaları makinenin etrafındaki sabitleyin, Aşağıdaki şekilde gösterildiği gibi ① ②.


-
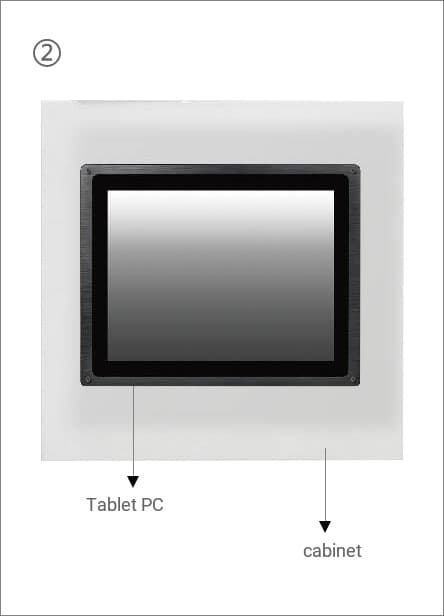
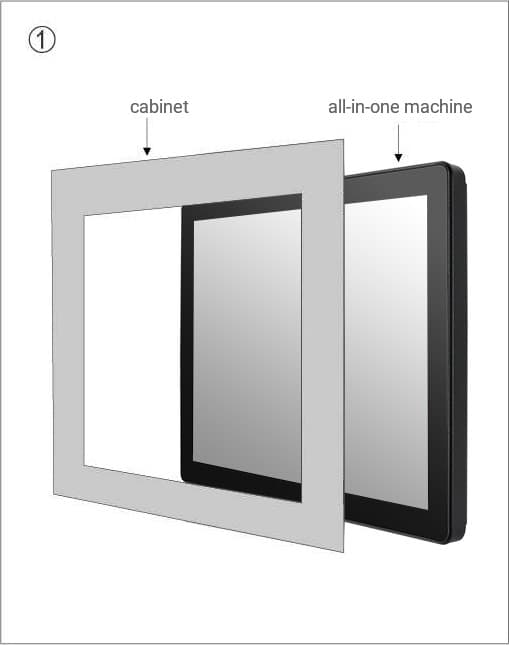
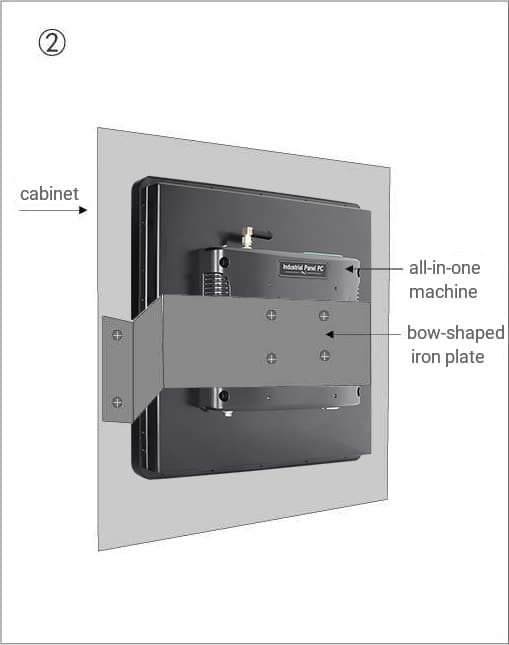
Flush-mounted/Embedded Installation
Kurulum adımları:
- Ekranı ortaya çıkarmak için kabini açın, ve tablet bilgisayarı arkadan kabine yerleştirin, Şekil ①'de gösterildiği gibi.
- Hepsi bir arada makineyi yay şeklinde bir demir plaka ile sabitleyin ve kabin paneline sabitleyin, Şekil ②'de gösterildiği gibi.

-
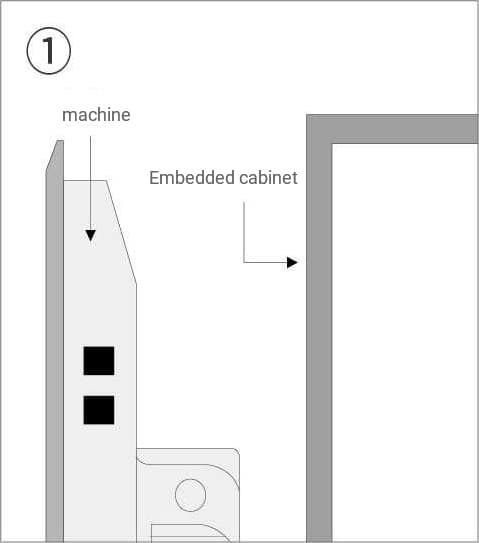
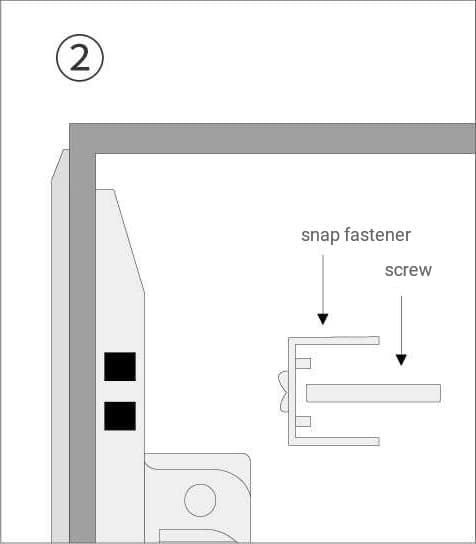
Geçmeli/Panele monteli/Gömme/Harici-gömülü Kurulum
Kurulum adımları:
- Makineyi gömülü kabine yerleştirin, Şekil ①'de gösterildiği gibi.
- Makineyi dolapla hizalayın, Klipsleri ve vidaları çıkarın, Şekil ②'de gösterildiği gibi.
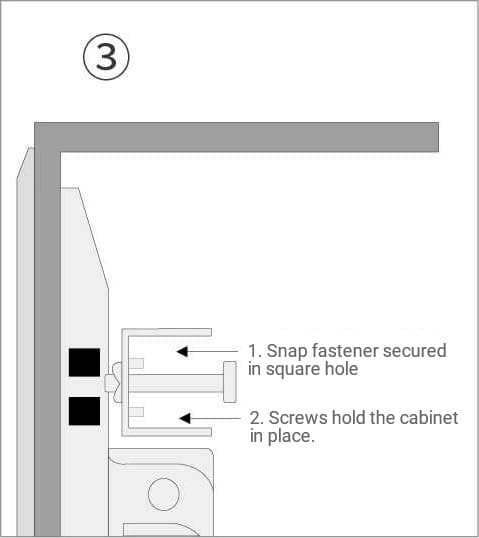
- Klipsi makinenin yan tarafındaki kare deliğe koyun ve kabini sabitlemek için vidayı sıkın, Şekil ③'de gösterildiği gibi.
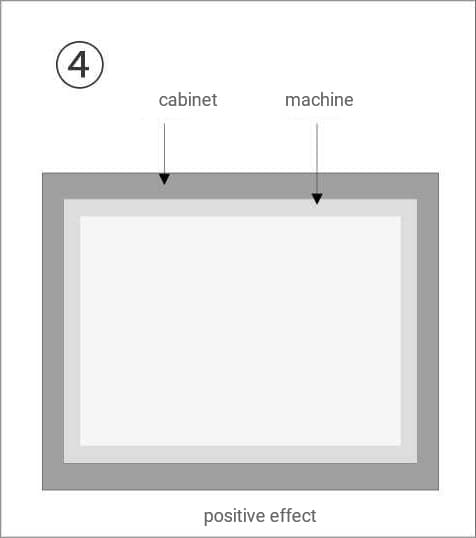
- Diğer dört çıtçıt deliğinin kurulumunu ve sabitlenmesini tamamlayın, ④'da gösterildiği gibi.


Daha Fazla Dil Geliyor!!!