-
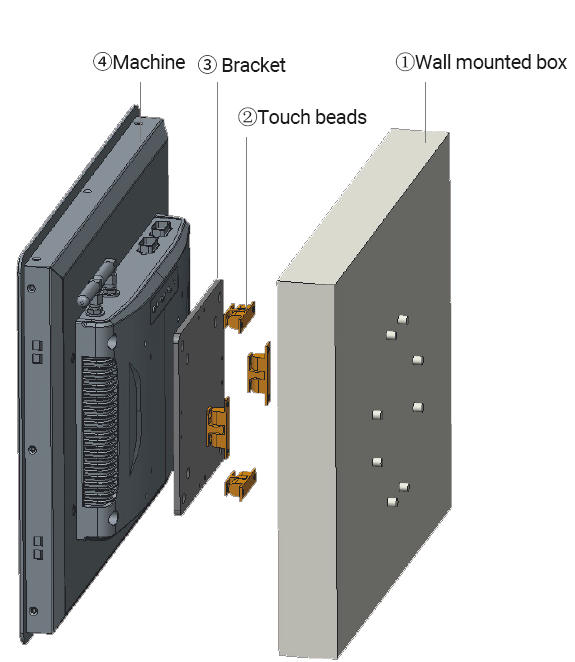
Instalación embebida en la pared
Métodos de instalación:
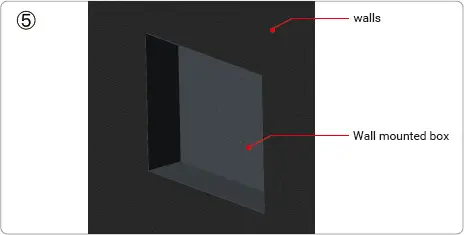
- En primer lugar, Arregle la caja de montaje de la pared (Higo. ①) en la pared, El efecto se muestra en (Higo. ⑤).
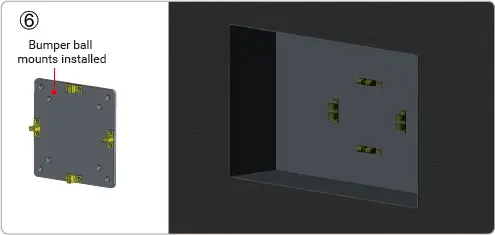
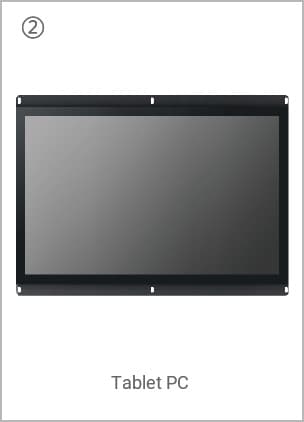
- Instale las cuentas táctiles (Figura ②) en el soporte (Figura ③) y la caja incrustada, El efecto se muestra en la figura ⑥.
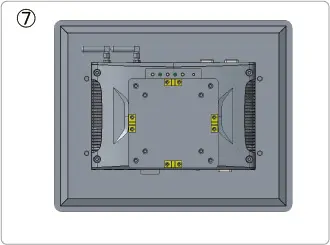
- Instalar el soporte (Figura ③) En la cubierta posterior de la máquina, El efecto se muestra en la figura ⑦
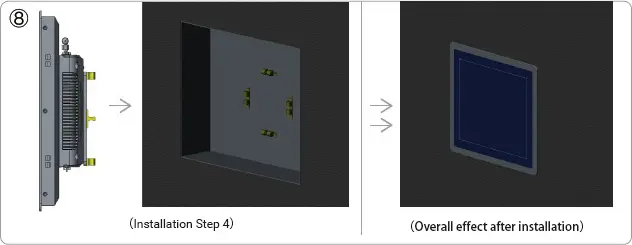
- Se instalará en el soporte de la máquina (Figura ④) Cuentas táctiles alineadas con la caja de pared incrustada cuentas táctiles debajo de la prensa, Touch Beads fusionados después de que se complete la instalación, El efecto se muestra en (Figura ⑧).


-
Instalación de marco abierto
Pasos de instalación:
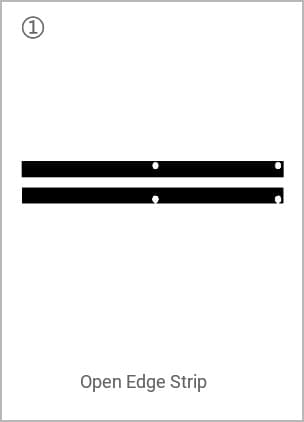
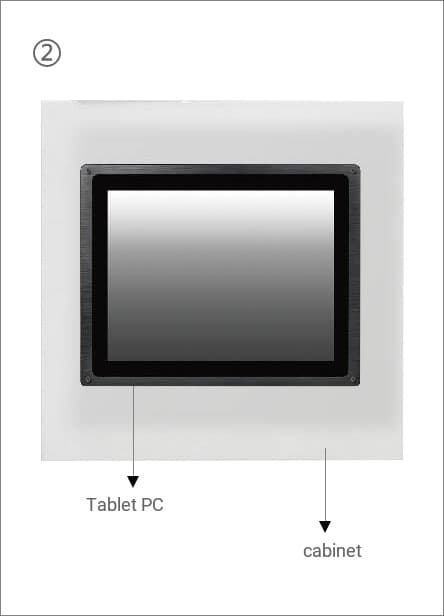
- Instale la tira de borde abierto en la parte posterior de la tableta como se muestra en la Figura ②.
- Pon la máquina en el gabinete, Arregle las tiras laterales y complete la instalación, Como se muestra en la figura ③.

-
Instalación de montones de bastidores
Pasos de instalación:
- Los agujeros de los tornillos están reservados en las cuatro esquinas de la máquina., Como se muestra en la figura ①.
- Pon la máquina en el gabinete, Arregle los tornillos a su alrededor, & Completa la instalación, Como se muestra en la figura ②.

-
Instalación de voladizo
Pasos de instalación:
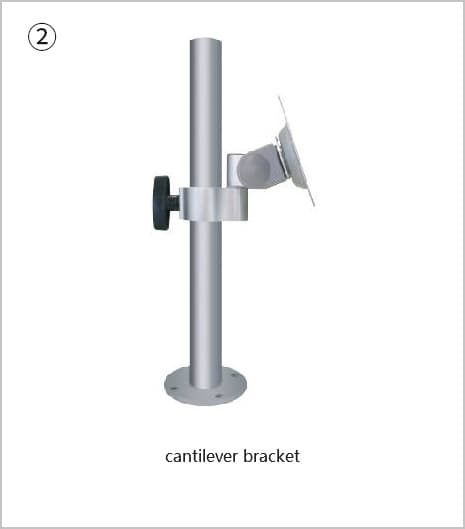
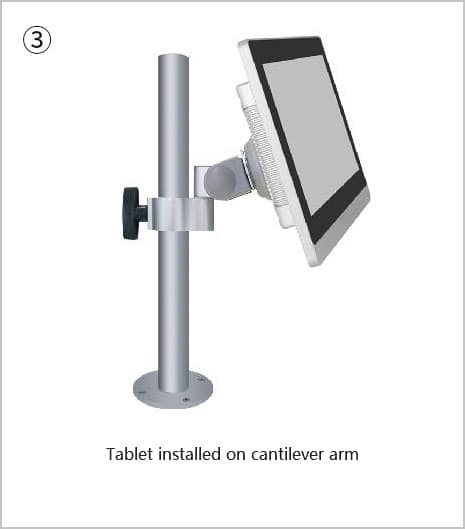
- Asegure el soporte en voladizo ② al orificio reservado en la parte posterior de la tableta ① con tornillos para completar la instalación, Como se muestra en la figura ③.

-
Montaje con impresión/plegable
Pasos de instalación:
- Atornille el soporte de la rejilla ② y el orificio reservado en la parte posterior de la tableta ①, Como se muestra en la figura ③.


-
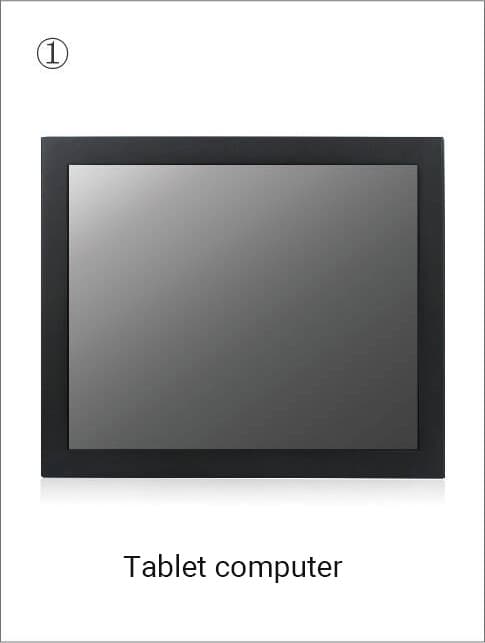
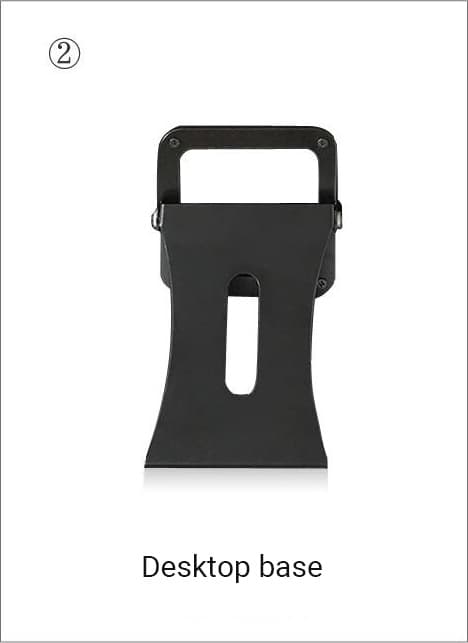
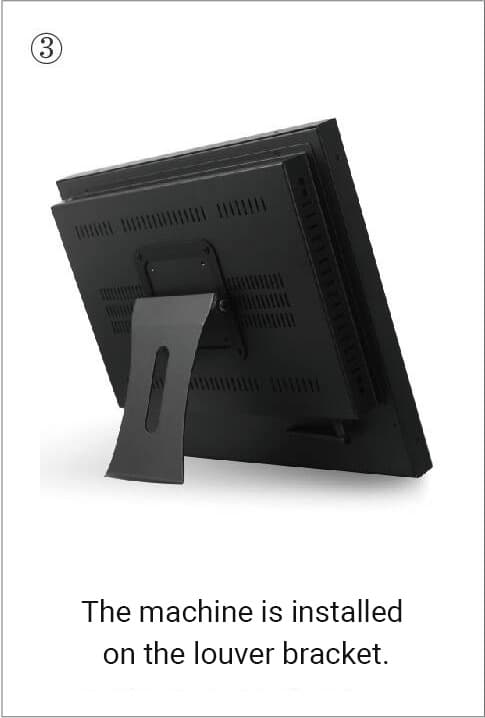
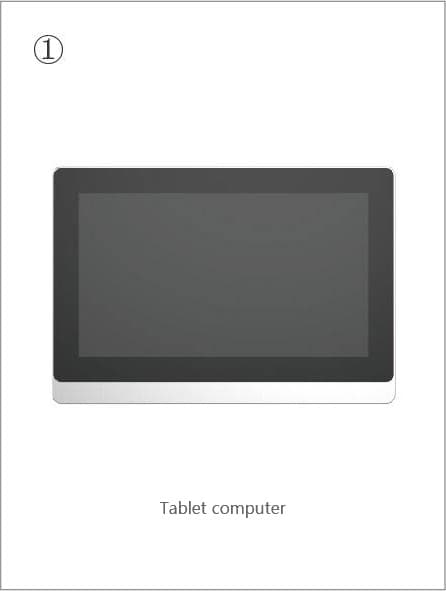
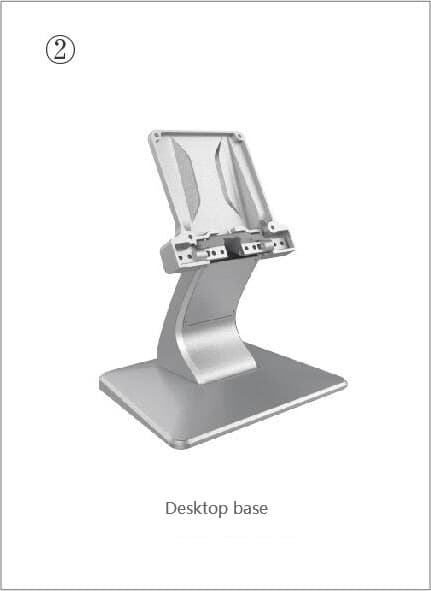
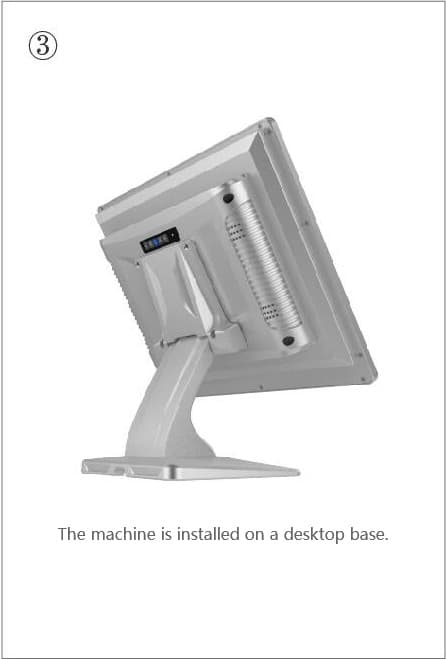
Instalación de escritorio
Pasos de instalación:
- Apriete los tornillos entre el soporte de escritorio ② y el orificio reservado en la parte posterior de la computadora de la pantalla LCD ① para completar la instalación, Como se muestra en la figura ③.


-
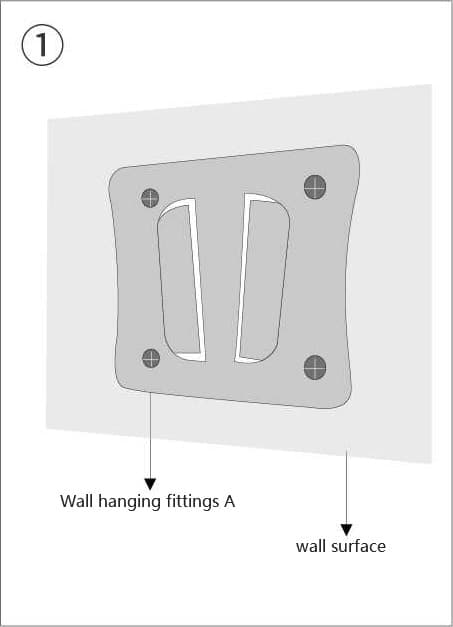
Instalación montada en la pared
Pasos de instalación:
- Instale el ajuste montado en la pared en la pared y apriete los tornillos, Como se muestra en la figura ①.
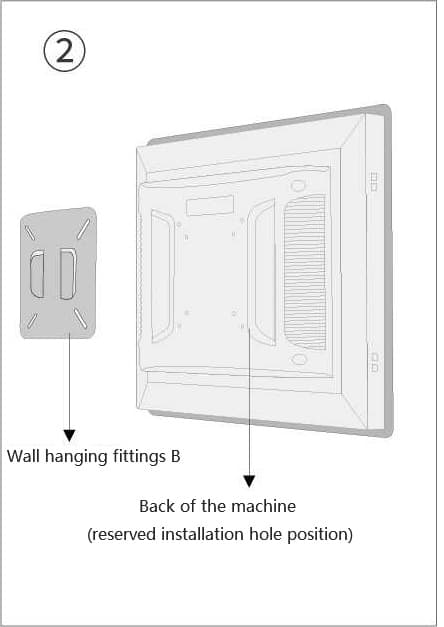
- La posición del ajuste montada en la pared B y la cara posterior de la máquina se muestra en la Figura ②.
- Instale el accesorio B montado en la pared en la parte posterior de la máquina y apriete los tornillos, Como se muestra en la figura ③.
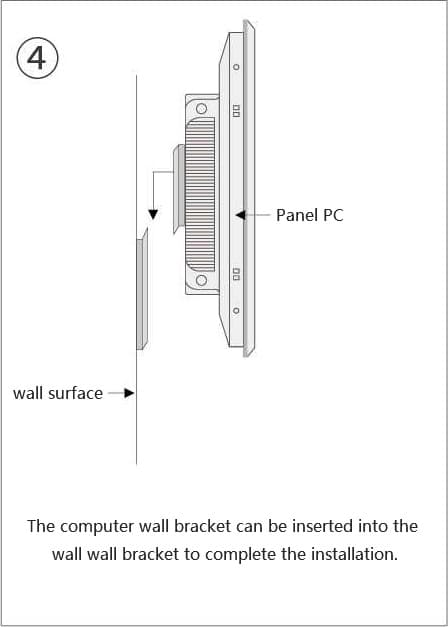
- Inserte la pared de la máquina que se ajusta a B en la pared de la pared que se ajusta a un, y complete la instalación, Como se muestra en la figura ④.


-
Instalación empotrada
Pasos de instalación:
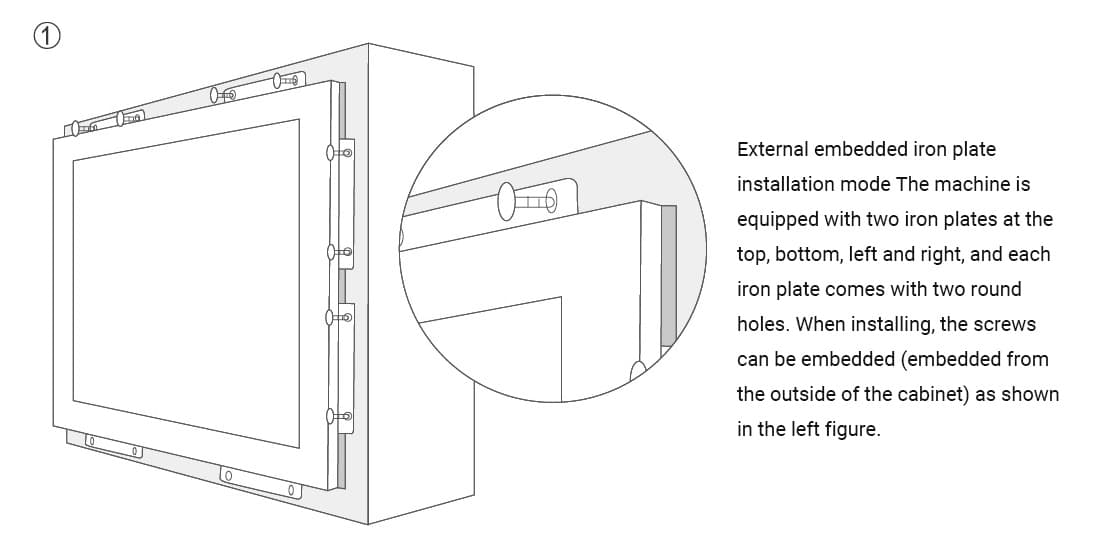
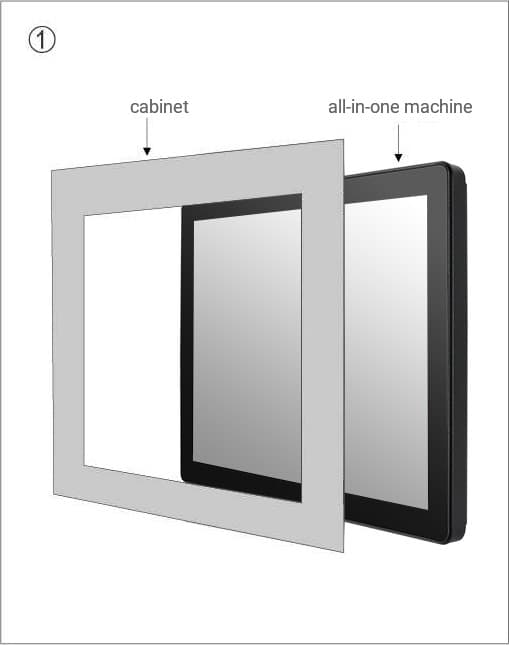
- Abra el gabinete al tamaño de la pantalla expuesta y fije las placas de hierro alrededor de la máquina, Como se muestra en la siguiente figura ① ②.


-
Instalación montada en descarga/incrustada
Pasos de instalación:
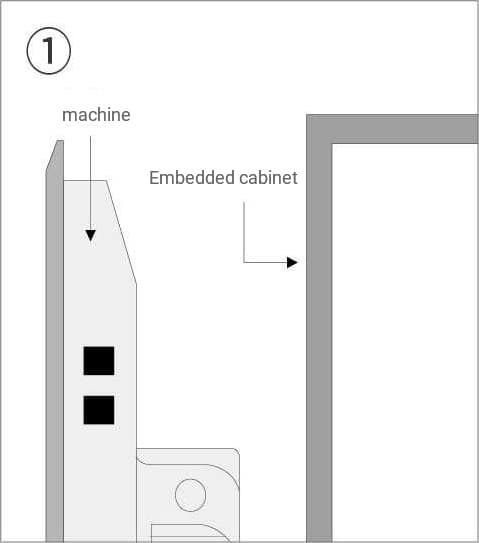
- Abra el gabinete para exponer la pantalla, e inserte la tableta en el gabinete desde la parte trasera, Como se muestra en la figura ①.
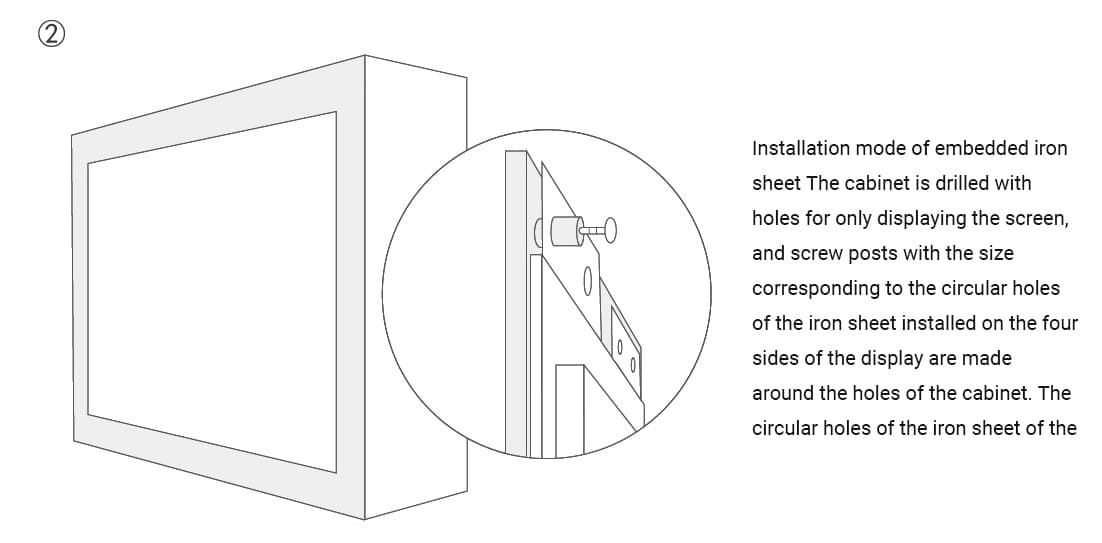
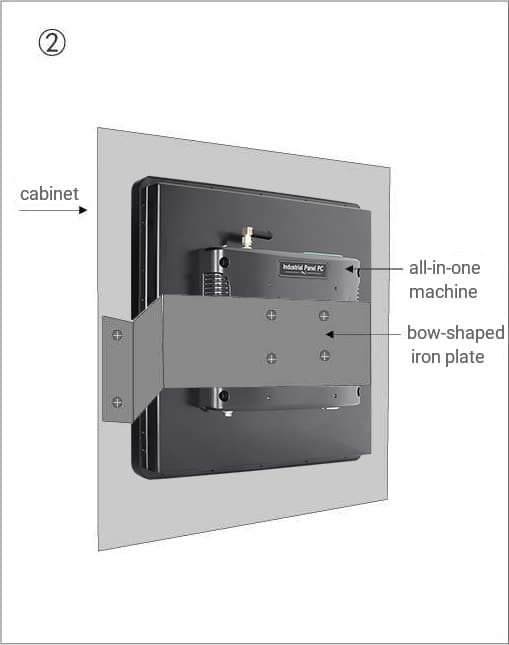
- Asegure la máquina todo en uno con una placa de hierro en forma de arco y fijola en el panel del gabinete, Como se muestra en la figura ②.

-
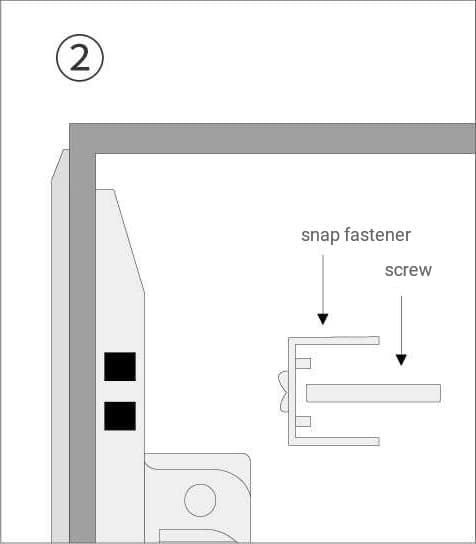
Instalación de Snap-In/Panel montada/empotrada/con incrustaciones externas
Pasos de instalación:
- Coloque la máquina en el gabinete incrustado, Como se muestra en la figura ①.
- Alinear la máquina con el gabinete, Retire los clips y los tornillos, Como se muestra en la figura ②.
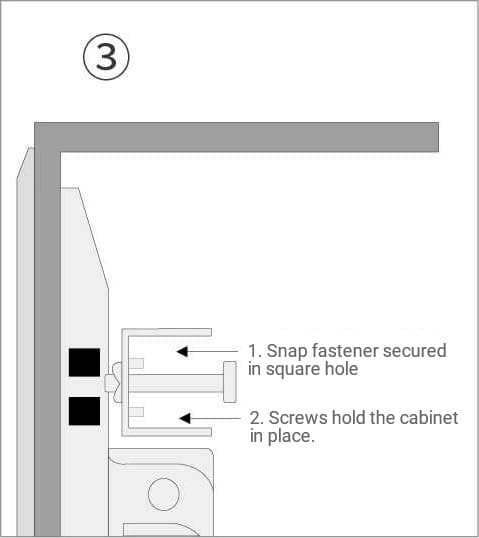
- Coloque el clip en el orificio cuadrado en el costado de la máquina y apriete el tornillo para asegurar el gabinete, Como se muestra en la figura ③.
- Complete la instalación y fijación de los otros cuatro agujeros de ajuste, Como se muestra en ④.


Viene más lenguaje!!!