-
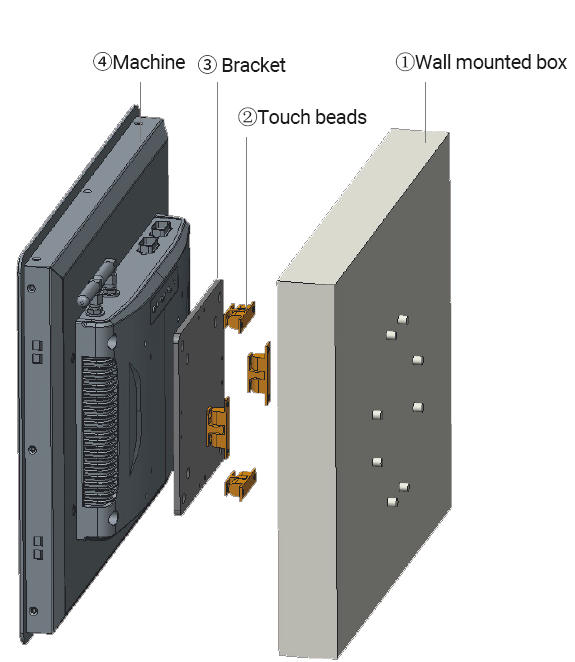
Wall-embedded Installation
Installation Methods:
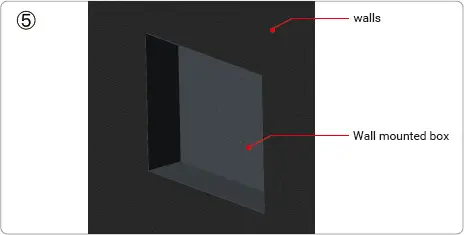
- Firstly, fix the wall mounting box (Fig. ①) into the wall, The effect is shown in (Fig. ⑤).
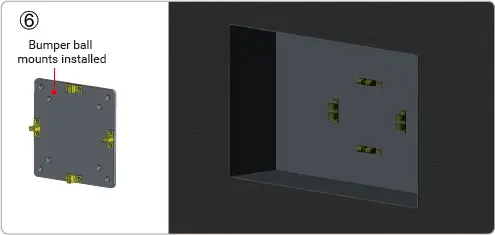
- Install the touch beads (Figure ②) on the bracket (Figure ③) and the embedded box, the effect is shown in Figure ⑥.
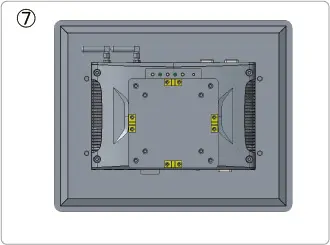
- Install the bracket (Figure ③) on the back cover of the machine, the effect is shown in Figure ⑦
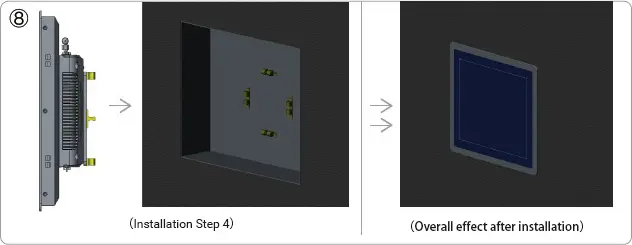
- It will be installed on the bracket of the machine (Figure ④) touch beads aligned with the embedded wall box touch beads under the press, touch beads merged after the installation is complete, the effect is shown in (Figure ⑧).


-
Open Frame Installation
Installation Steps:
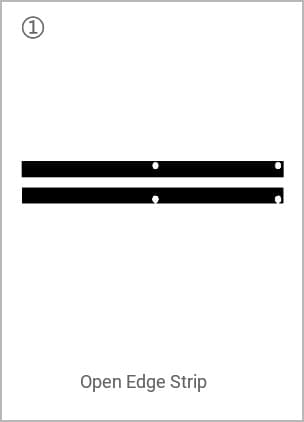
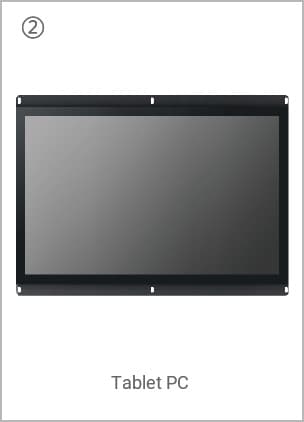
- Install the open edge strip① on the back of the tablet as shown in Figure ②.
- Put the machine into the cabinet, fix the side strips and complete the installation, as shown in Figure ③.

-
Rackmount Installation
Installation Steps:
- Screw holes are reserved at four corners of the machine, as shown in Figure ①.
- Put the machine into the cabinet, fix the screws around it, & complete the installation, as shown in Figure ②.

-
Cantilever Installation
Installation Steps:
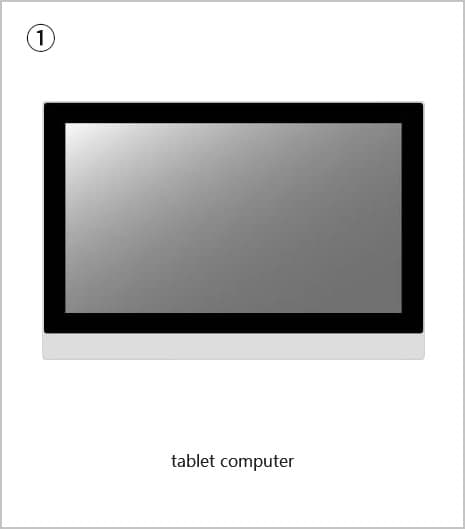
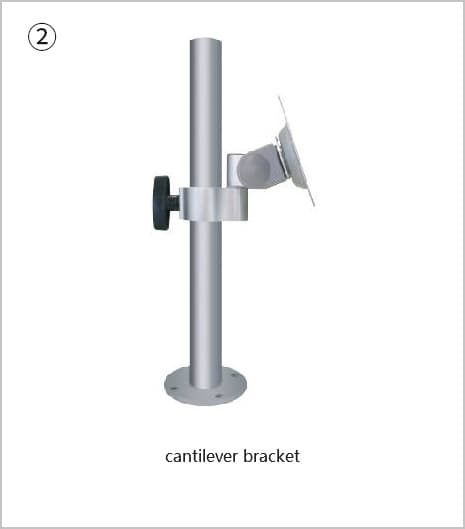
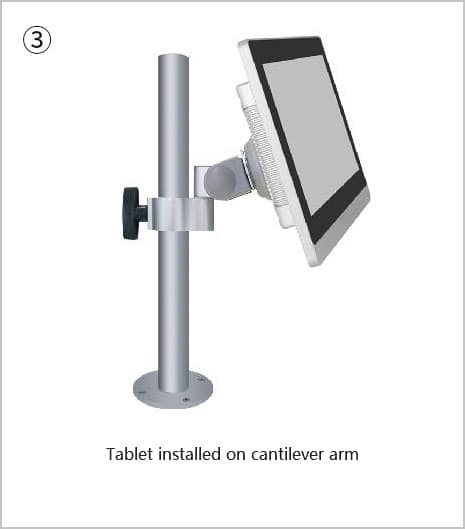
- Secure the cantilever bracket ② to the reserved hole on the back of the tablet computer ① with screws to complete the installation, as shown in Figure ③.

-
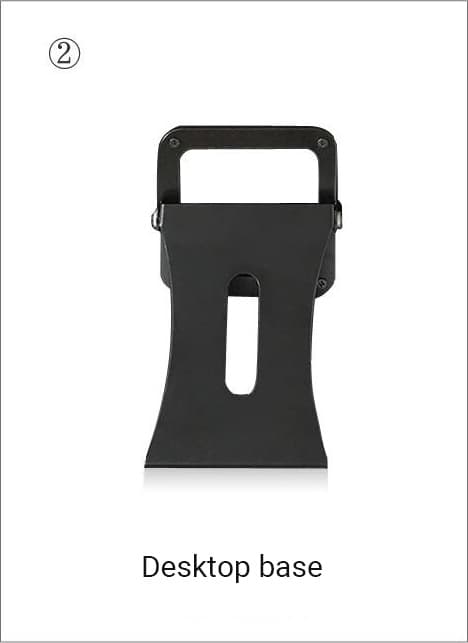
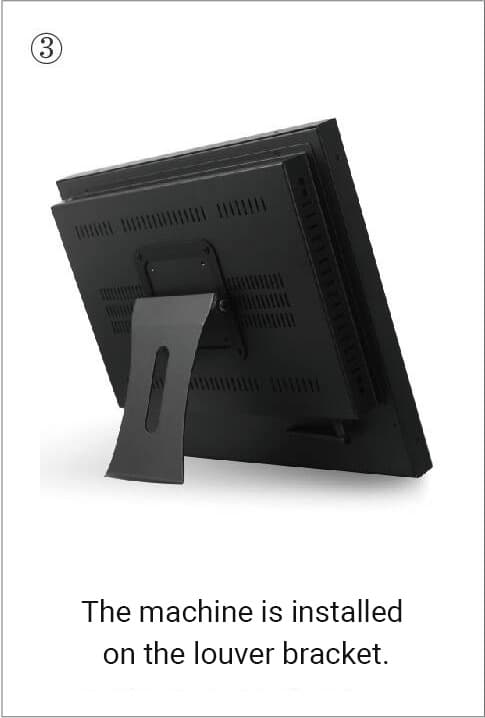
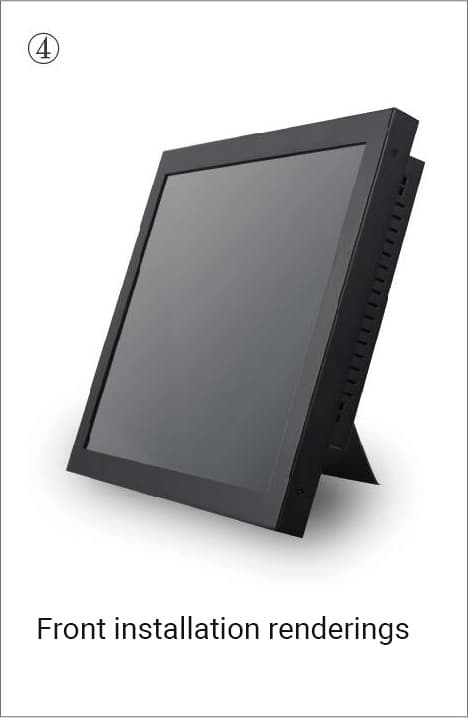
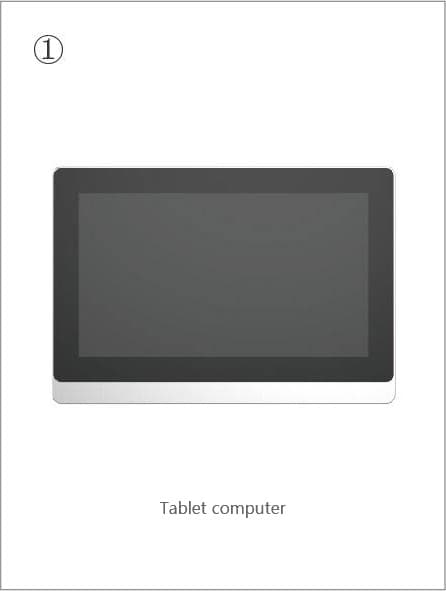
Louvered/Folding Mounting
Installation Steps:
- Screw the louver bracket ② and the reserved hole on the back of the tablet computer ①, as shown in Figure ③.


-
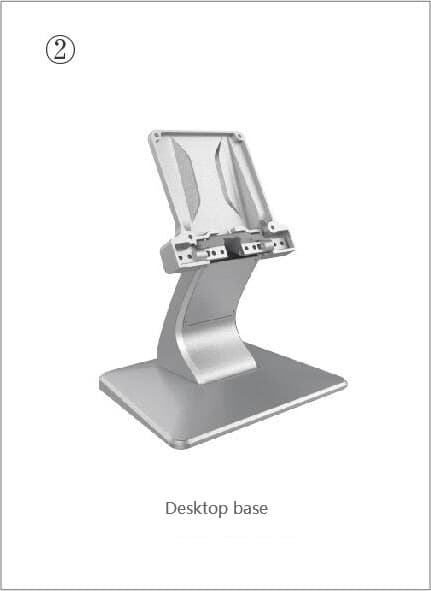
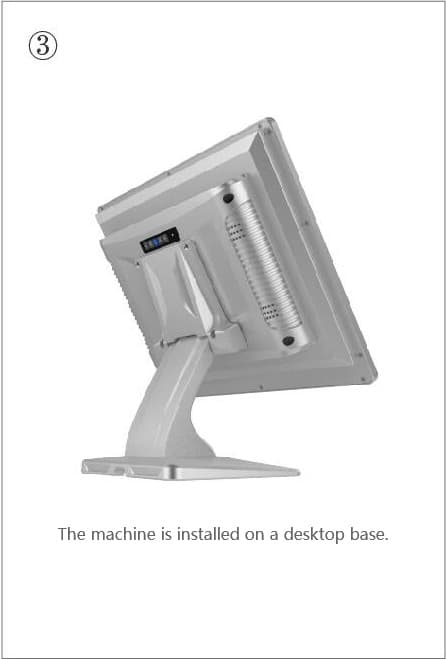
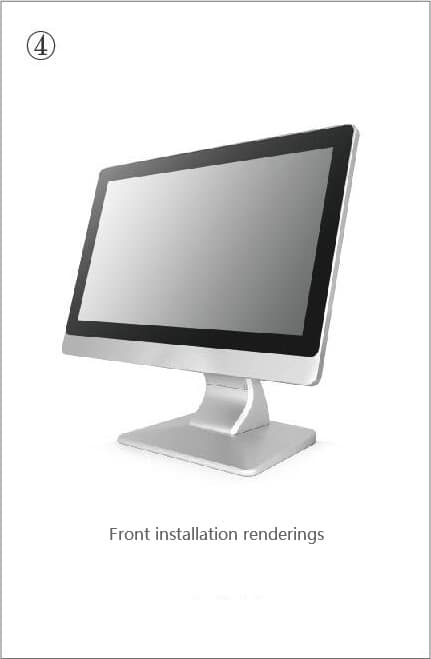
Desktop Installation
Installation Steps:
- Tighten the screws between the desktop bracket ② and the reserved hole on the back of LCD Screen Computer ① to complete the installation, as shown in Figure ③.


-
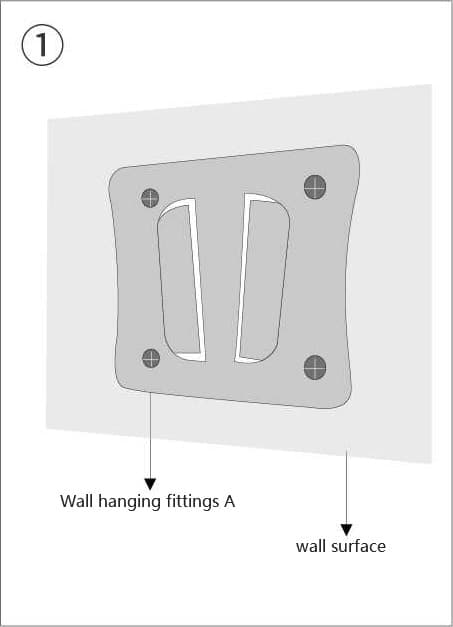
Wall-mounted Installation
Installation Steps:
- Install the wall-mounted fitting A on the wall and tighten the screws, as shown in Figure ①.
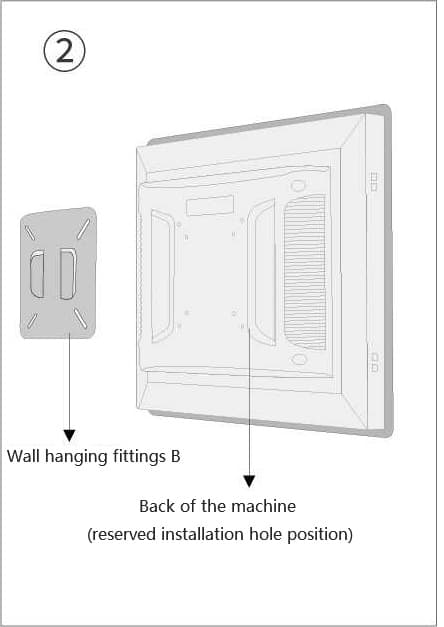
- The position of the wall-mounted fitting B and the back face of the machine is shown in Figure ②.
- Install the wall-mounted accessory B on the back of the machine and tighten the screws, as shown in Figure ③.
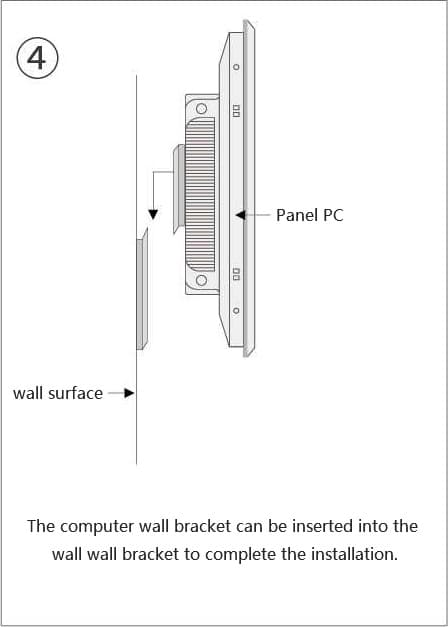
- Insert the machine wall fitting B into the wall wall fitting A, and complete the installation, as shown in Figure ④.


-
Iron-sheet Recessed Installation
Installation Steps:
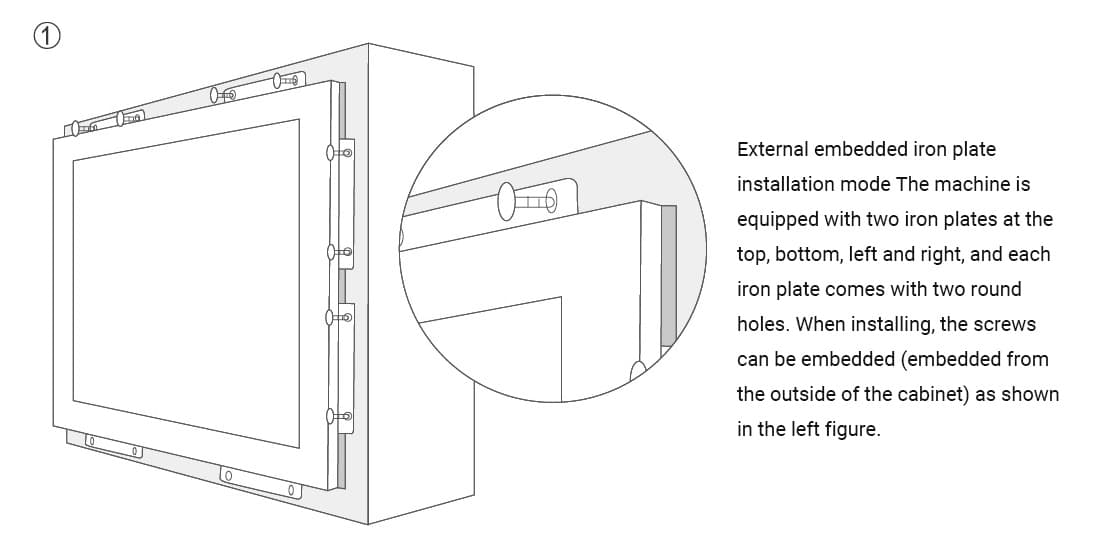
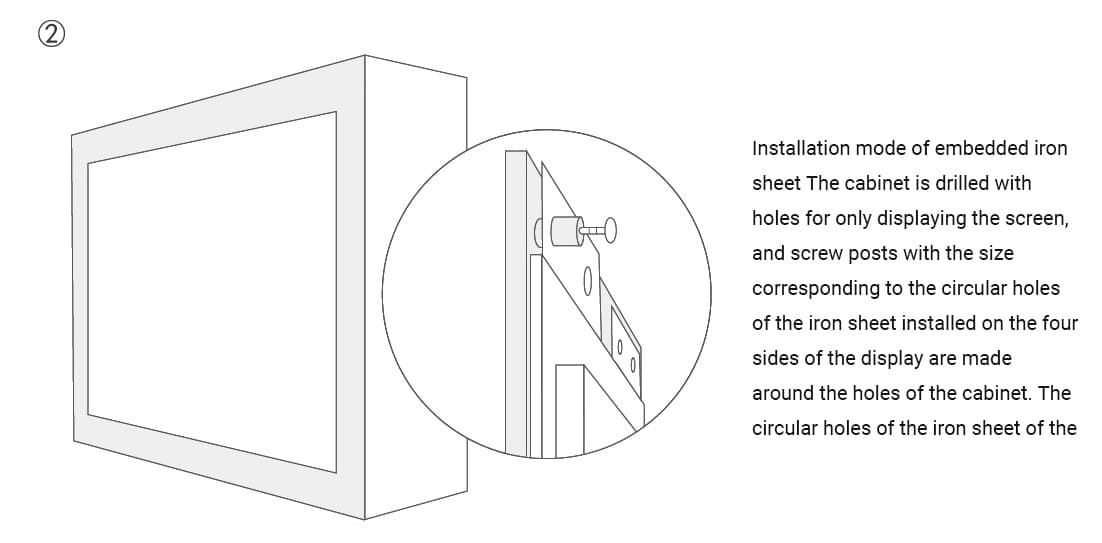
- Open the cabinet to the size of the exposed screen and fix the iron plates around the machine, as shown in the following figure ① ②.


-
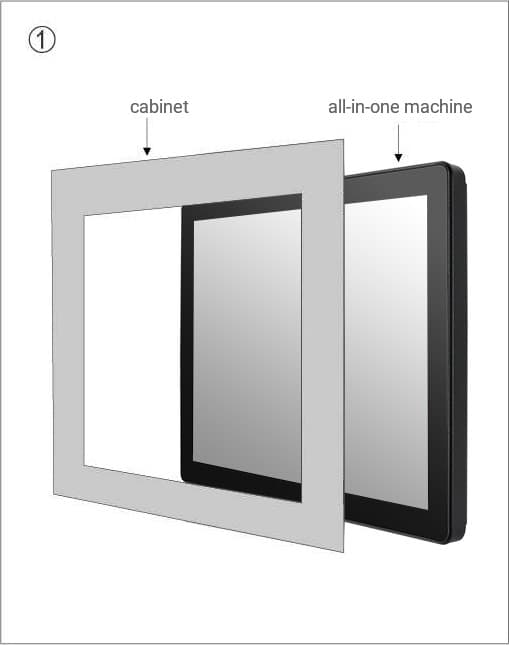
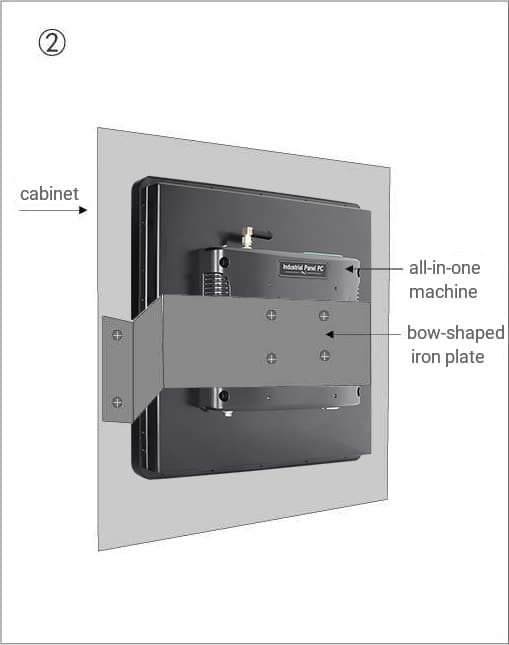
Flush-mounted/Embedded Installation
Installation Steps:
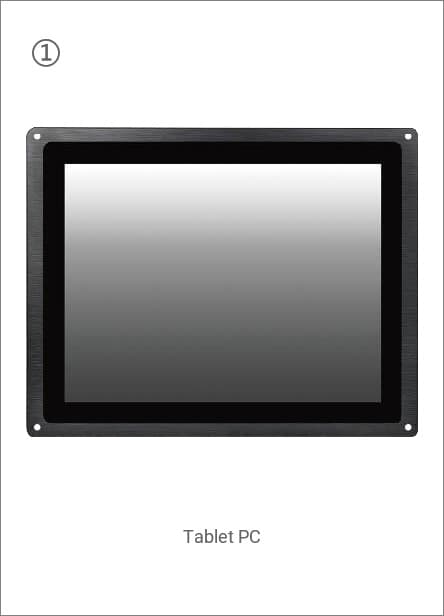
- Open the cabinet to expose the screen, and insert the tablet computer into the cabinet from the rear, as shown in Figure ①.
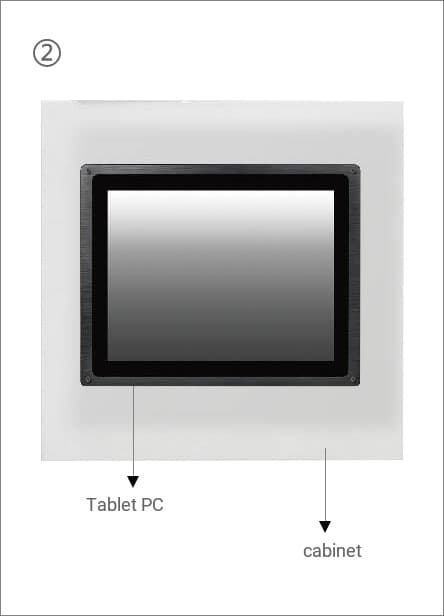
- Secure the all-in-one machine with a bow-shaped iron plate and fix it to the cabinet panel, as shown in Figure ②.

-
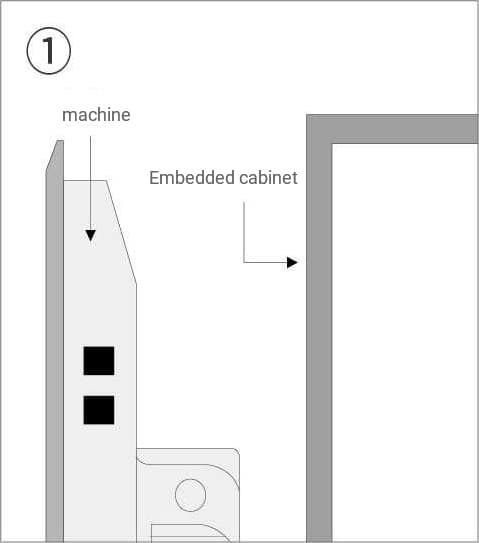
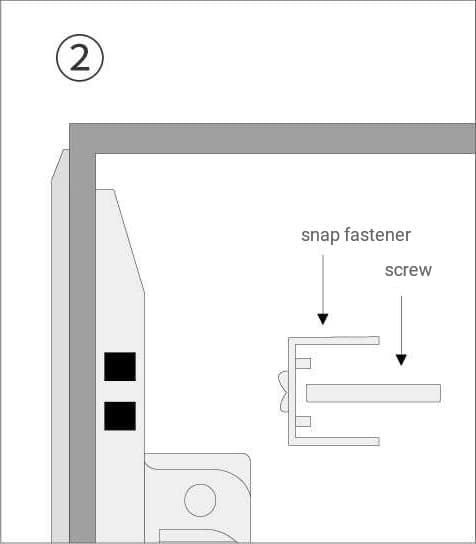
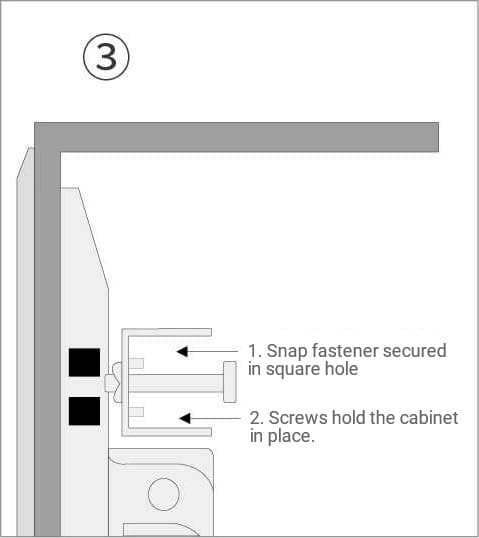
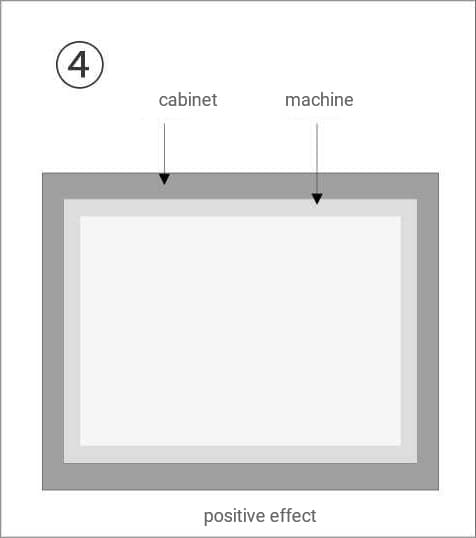
Snap-in/Panel-mounted/Recessed/External-embedded Installation
Installation Steps:
- Place the machine into the embedded cabinet, as shown in Figure ①.
- Align the machine with the cabinet, remove the clips and screws, as shown in Figure ②.
- Snap the clip into the square hole on the side of the machine and tighten the screw to secure the cabinet, as shown in Figure ③.
- Complete the installation and fixation of the other four snap-fit holes, as shown in ④.


More Language is Comming!!!